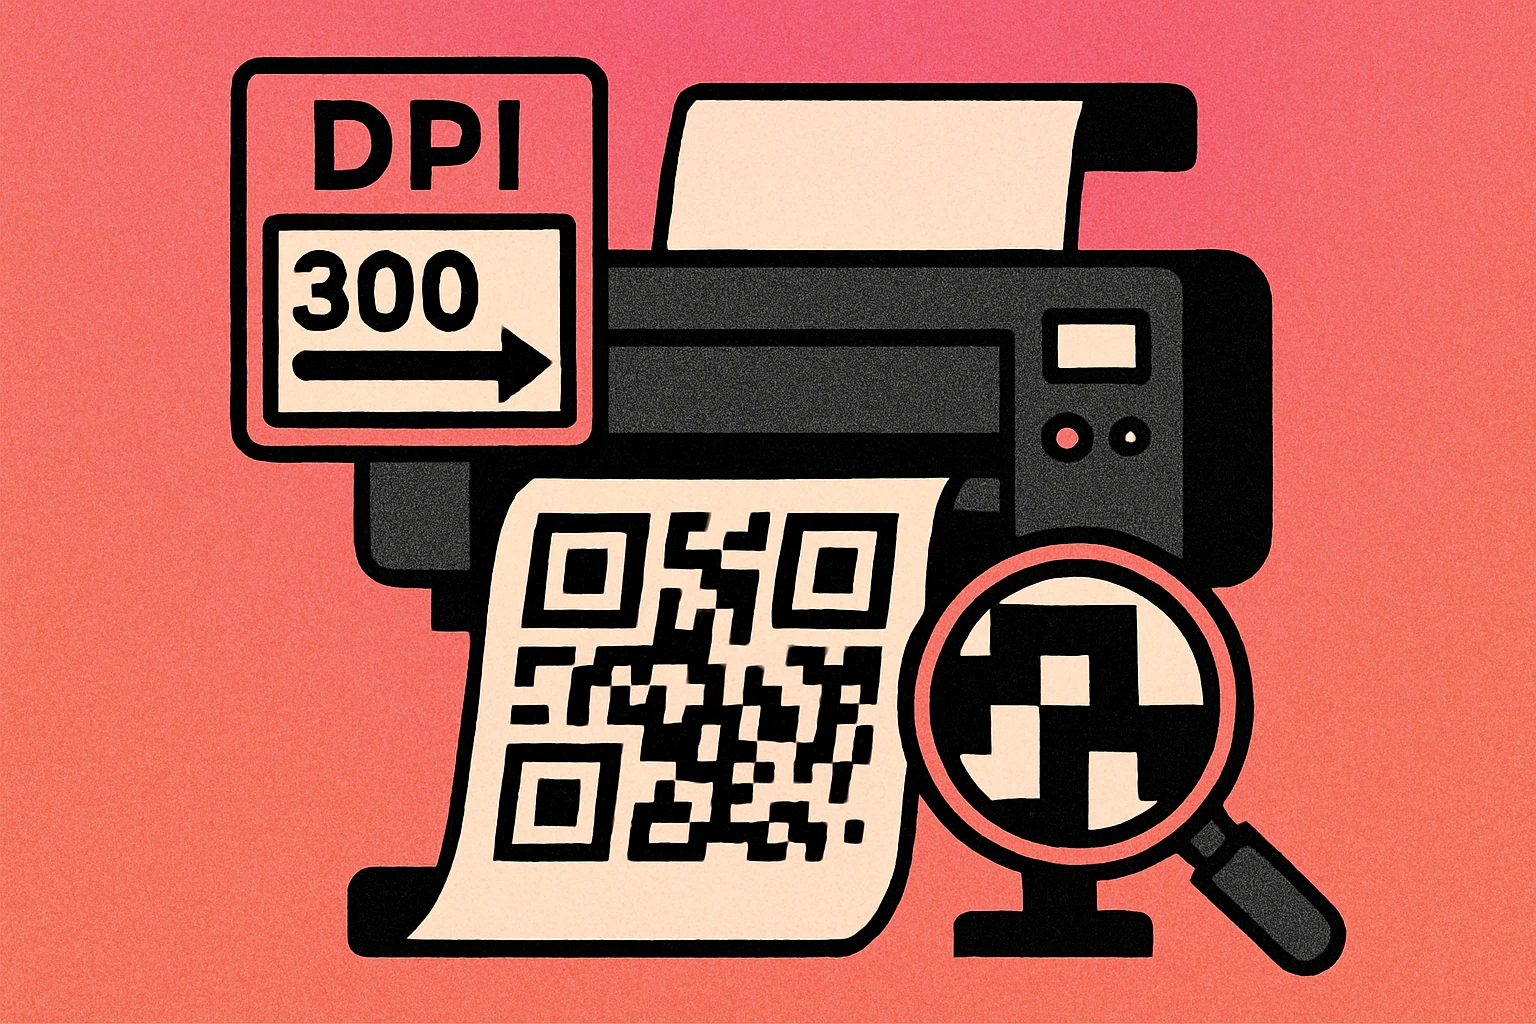
Why Resolution Matters for Printed QR Codes
A QR code displayed on a screen is rendered pixel by pixel at whatever size the screen needs. But print is different. When ink hits paper, every dot is permanent — and if the QR code modules (the black and white squares that carry the data) are not razor-sharp, scanners struggle to tell a dark module from a light one.
The consequence is a code that either scans slowly, produces errors, or fails entirely. And because a printed piece — a business card, a poster, a product label — may be scanned thousands of times over its lifetime, a single resolution mistake can mean thousands of failed scan attempts.
Resolution problems fall into two categories. The first is insufficient DPI: a raster image (PNG or JPG) that does not have enough pixels to reproduce crisp edges when printed at its intended size. The second is incorrect format choice: using a raster file where a vector format (SVG, PDF, EPS) would scale perfectly. Understanding both is the foundation of print-ready QR code production. For broader design context, see our guide to custom QR code design and our overview of QR code file formats.
For print, QR code modules must have hard black-and-white edges. Any blurring, anti-aliasing, or grey fringing introduced by low resolution reduces scan reliability. When in doubt, always go higher resolution or switch to a vector format.
DPI Explained — 72 vs 150 vs 300 DPI
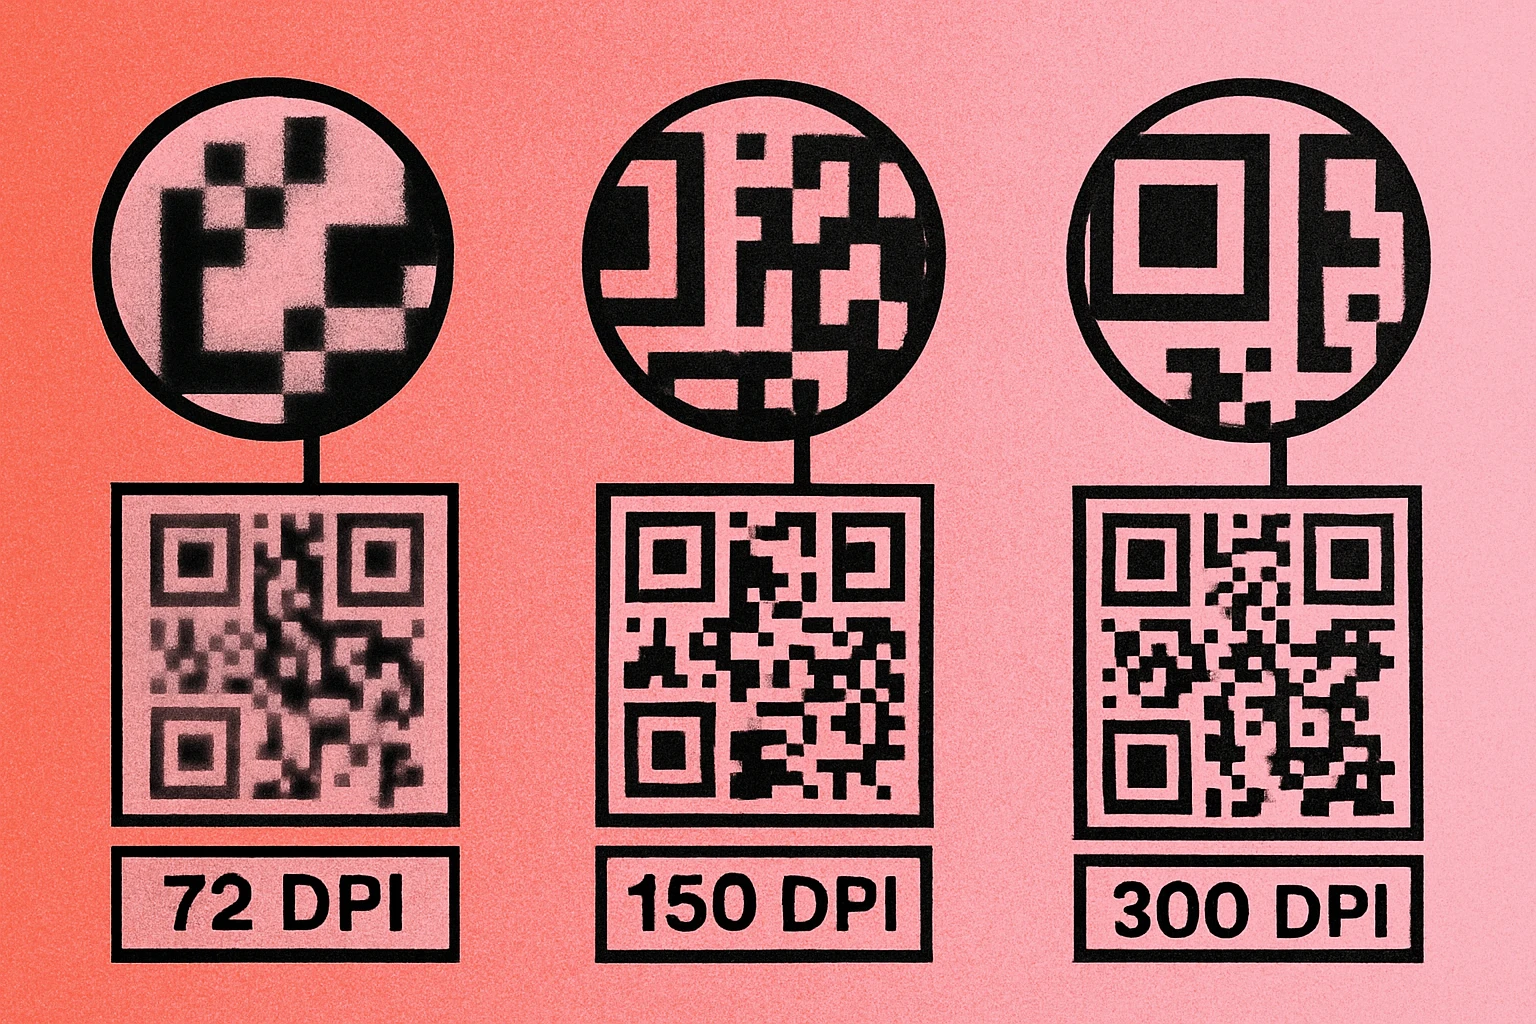
DPI stands for dots per inch — the number of ink dots a printer places in one linear inch of output. The higher the DPI of your source image at its intended print size, the more detail the printer can reproduce faithfully. Here is how the three most common DPI values map to real-world print quality:
| DPI | Common Use | Print Quality | QR Code Verdict |
|---|---|---|---|
| 72 DPI | Screen / web display | Blocky, pixelated on paper | Not for print |
| 150 DPI | Large-format, billboards, banners | Acceptable at viewing distance | Large format only |
| 300 DPI | Offset & digital printing | Sharp, professional quality | Standard for print |
| 600 DPI | Fine detail, small labels | Extremely sharp | Ideal for tiny codes |
How DPI Translates to Pixel Dimensions
The practical implication: if you want to print a QR code at 2 × 2 inches at 300 DPI, your PNG file must be at least 600 × 600 pixels (2 inches × 300 dots per inch = 600 pixels per side). For a 4 × 4 inch code at 300 DPI, you need a 1200 × 1200 px image.
Most web-based QR generators export PNGs at 72 DPI by default with dimensions like 200 × 200 px or 400 × 400 px. That size is fine on screen, but at 300 DPI those same files would only print crisply at 0.67″ and 1.33″ square respectively — far too small for most use cases. Always check your generator's export settings, or better yet, download SVG and let the vector scale to any size.
Required pixel size = (intended print size in inches) × (target DPI). For a 3-inch QR code at 300 DPI: 3 × 300 = 900 pixels per side minimum.
Raster vs Vector — PNG/JPG vs SVG/PDF/EPS
Choosing the right file format is often more important than DPI settings. There are two fundamental categories of image format, and they behave very differently when scaled for print.
Raster Formats (PNG, JPG)
Raster images are grids of pixels. Every pixel is a fixed color, and the image has a fixed resolution. When you enlarge a raster image beyond its native resolution, the software has to invent new pixels — a process called interpolation — which introduces blurring and edge softness. For QR codes, those blurry module edges are death to scannability.
- PNG: The best raster option for QR codes. Lossless compression preserves the sharp black-and-white edges. Never use JPG for QR codes — JPG's lossy compression algorithm introduces grey artifacts at the boundaries between dark and light modules.
- JPG: Avoid entirely for QR codes. The compression artifacts it creates around high-contrast edges are exactly the kind of distortion that confuses QR scanners.
Vector Formats (SVG, PDF, EPS)
Vector images are defined by mathematical paths and shapes, not pixels. They scale to any size — a business card or a billboard — and the printer renders them at the maximum resolution of the output device. There is no blurring, no pixelation, and no quality loss at any size.
- SVG: The ideal format for web-to-print workflows. Open in any modern browser or vector editor (Illustrator, Inkscape, Affinity Designer). Easily embedded in web pages and print layouts. Our QR code file formats guide covers SVG in full detail.
- PDF: The professional print standard. Printers, print shops, and desktop publishing software all natively support PDF. Embed your QR code as a vector PDF in InDesign, Canva Pro, or any layout application.
- EPS: The legacy vector format preferred by older print workflows and some commercial printers. Still widely accepted by professional print bureaus alongside PDF.
For screen use: PNG at 72–150 DPI is fine. For any print use: always export SVG or PDF. These vector formats are resolution-independent and will always produce perfectly sharp modules regardless of print size.
Minimum Print Sizes by Material
Even a perfectly sharp, 300 DPI QR code will fail if it is printed too small. QR codes have a minimum readable size that depends on the complexity of the code (how much data it encodes), the error correction level, and the expected scanning distance. The table below gives practical minimums for the most common print materials.
| Material | Min Size | Recommended | Scan Distance | Notes |
|---|---|---|---|---|
| Business Card | 1.5 cm (0.6″) | 2.5 cm (1″) | 10–20 cm | Keep URL short; use high error correction |
| Flyer / A5–A4 | 2.5 cm (1″) | 4 cm (1.6″) | 15–40 cm | Place in lower-right corner for natural eye path |
| Poster / A3–A1 | 4 cm (1.6″) | 6 cm (2.4″) | 30–80 cm | Include "Scan me" CTA label near code |
| Banner / Roll-up | 6 cm (2.4″) | 10 cm (4″) | 50 cm–1.5 m | Viewers scan from standing distance |
| Billboard / Large format | 20 cm (8″) | 40+ cm (16″+) | 2–10 m | 150 DPI acceptable; SVG/PDF essential |
| Product Label / Tag | 1.5 cm (0.6″) | 2 cm (0.8″) | 5–15 cm | 600 DPI PNG or SVG; maximize quiet zone |
These minimums assume a Version 1–3 QR code (low data density) at error correction Level M or H. If your QR code encodes a long URL or uses a dense version, add 20–30% to these minimums. For a comprehensive size reference covering all scenarios, see our dedicated QR code size guide.
Also factor in the quiet zone — the blank white border that must surround the code. The ISO standard requires at least 4 module widths of clear space on all four sides. Violating the quiet zone is one of the most common QR code design mistakes that causes scan failures on otherwise well-produced print pieces.
Download a Print-Ready QR Code — Free
Generate your QR code and export as SVG for perfect print quality at any size. No account required.
Format Selection Guide
Not sure which file format to request from your QR generator? Use this decision guide based on your output destination. The right choice eliminates most resolution and quality problems before they start. For a deeper technical comparison of all available formats, read our full QR code file formats guide.
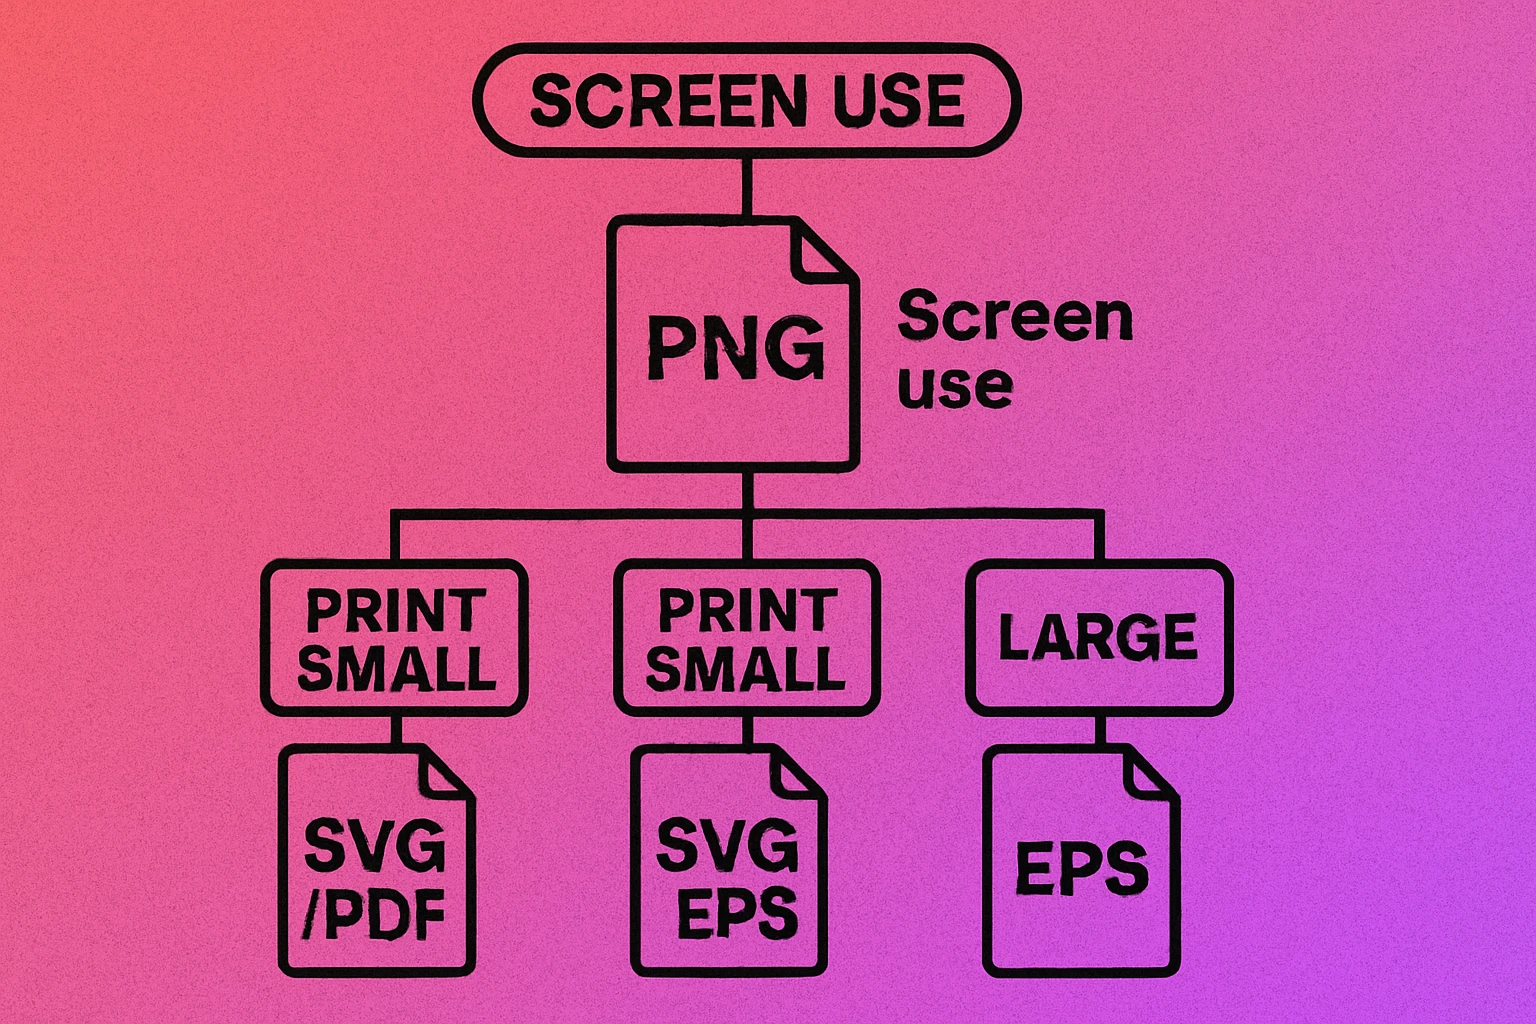
Format Decision Tree
If you are customizing your QR code with brand colors or a logo, vector formats are even more important — they preserve color fidelity and logo sharpness that raster compression can degrade. See our guides on custom QR code design and the complete QR code guide for more on designing brand-consistent codes.
Pre-Print Checklist
Before approving your print file or sending it to the printer, run through this checklist. Catching a resolution or format issue at the proof stage costs nothing. Catching it after 10,000 flyers are printed costs a great deal more.
-
Test-scan the digital proof. Open the PDF or print-resolution PNG on your screen and scan it with your phone camera. If it scans cleanly at screen size, it will scan at print size — but also scan a physical proof print before the full run.
-
Verify DPI at final print dimensions. In Photoshop, Acrobat, or your layout app, check the effective resolution of the QR code at its placed size. It must read 300 DPI or higher. If it reads below 200 DPI, regenerate the code at a larger pixel size or switch to vector.
-
Check the quiet zone. Measure the blank border around the code in your layout. It must be at least 4 module widths on every side. Do not let any other design element overlap or crowd the quiet zone — not text, bleeds, or decorative borders.
-
Confirm color values are true black and white. Your QR code modules should be 100% black (CMYK: 0,0,0,100 or RGB: 0,0,0) on a pure white background (CMYK: 0,0,0,0 or RGB: 255,255,255). Coloured QR codes need strong contrast — check with our color combinations guide. Avoid printing dark modules on dark backgrounds.
-
Proof the physical print. Request a physical proof (not just a PDF soft proof) before the full print run. Scan the proof under the same lighting conditions the final piece will be used in. Outdoor posters should be scanned outdoors; shelf labels should be scanned at shelf height.
-
Verify the encoded URL is live. This sounds obvious, but confirm the URL or content encoded in the QR code is correct and the destination page is live. A perfectly printed, perfectly scannable QR code that points to a 404 page is a wasted opportunity.
Scan your print proof with at least two different devices — an iPhone and an Android phone — as their camera algorithms interpret contrast differently. A code that barely scans on one device may fail entirely on another in real-world conditions.
Frequently Asked Questions
For most professional print jobs — brochures, flyers, business cards — you need at least 300 DPI at the final print size. For large-format prints like posters and banners, 150 DPI is acceptable because the viewing distance is greater. The safest approach for any print use is to export as SVG or PDF, which are resolution-independent and scale perfectly to any size without pixelation.
The absolute minimum for a simple QR code on a business card or tag is about 1.5 cm (roughly 0.6 inches) square. For practical reliability, 2.5 cm (1 inch) is recommended for close-range scanning. Larger materials like flyers should use codes at least 3–4 cm, and posters should go 5 cm or more to account for longer scanning distances.
For any professional print application, SVG or PDF is strongly preferred over PNG. Vector formats (SVG, PDF, EPS) are resolution-independent — they scale to any size without becoming blurry or pixelated. PNG is a raster format limited by the pixel dimensions it was exported at. If you must use PNG for print, generate it at the largest pixel size available (1000 px or higher) and ensure the DPI metadata is set to 300.
No. Scaling up a raster PNG introduces blurring and anti-aliasing artifacts that turn the sharp edges of QR code modules into grey gradients. Scanners need high-contrast black-and-white transitions to decode reliably. A 200×200 px PNG stretched to fill an A3 poster will likely fail to scan. Always regenerate the QR code at a larger native resolution, or better yet, use an SVG or PDF export instead.